Getting a pack ready-to-go to build a website is a common need for web developers. Buying a 50$ template with a complete dotnet integration is a dream as soon as you're attentive to code quality. This article will focus on building a dotnet web library containing your website UI that you can share across all your projects with a nuget package.
In this article, we will create a Visual Studio solution containing two projects. One will contain the main UI layout template and the second one a web application in order to test our template project.
Source code of the project is available here : https://github.com/Manu06D/makeITeasy.LayoutLibrary
Step by step creation of our VS solution
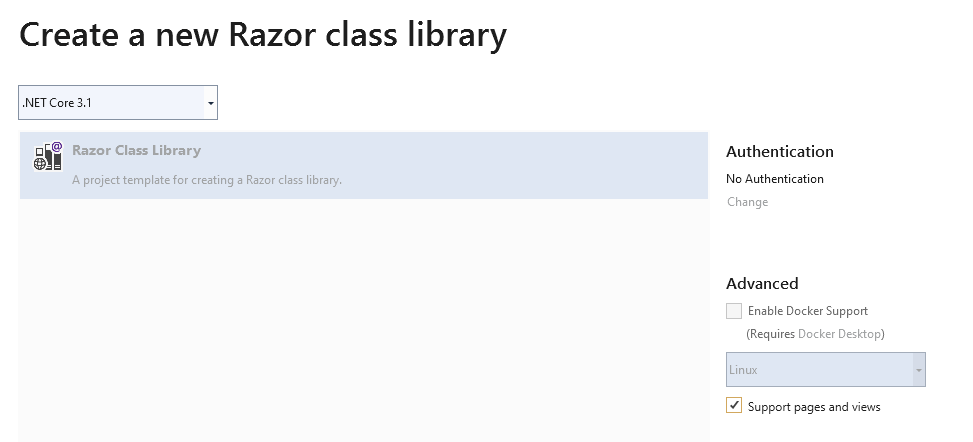
Let's first create a blank solution and then add a new project of type "Razor Class Library" (RCL). This project will contain all our front-end elements like views, javascript, style sheet. Check this documentation for more info about RCL.


During the project creation wizard, don't forget to check "Support pages and view"

Now, create a new web project that will be helpful during our template development process. Consider this project like a unit test solution with the only goal to test our template rendering. Add a reference on our web project to our template project.
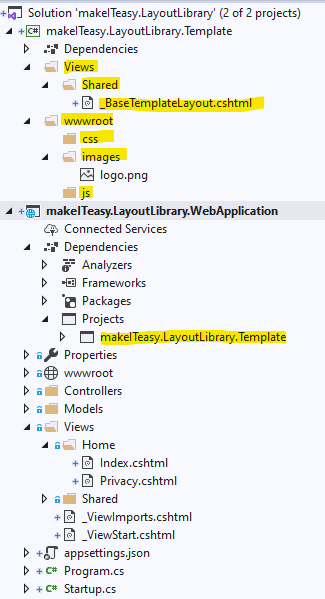
In the template root folder, create a two folders named Views and wwwroot. Inside the Views folder, create a sub-folder named Shared. In the wwwroot folder, create 3 folders named images, css, js.
This will help us to keep the same directory structure than a web site.
On the freshly created folder (Views\Shared), create a new View that will host our base layout (for example _BaseTemplateLayout.cshtml).

Now, let's start with the fun part ! We can customize our base template to integrate our design. Proceed like any other layout. Let's put this code for the sample :
The @RenderBody is essential because it will allow the child views to render their content in this layout.
The VS solution should compile without any error. Set our WebApp as startup project and launch it. Ensure that the web site is working properly.
Now, let's go to the webApp projet and open "Views\_ViewStart.cshtml" file. Replace the name of the default layout (usually _Layout) by the name of the layout created in the template project (in my example _BaseTemplateLayout).
Compile, start our project and check that the page displays our new design.


In order to live debug the template (and get a recompilation of Layout/Views), you need to add watchers to specific folders as explained in this article. In the following example, the line 6 to 19 will configure razor live compilation to monitor the folder of the webApp and the folder of the template project.
Now let's see some tips around RCL.
1. Nuget Package
We can build a nuget package of our template in order to use it in other web projects like we do with NewtonsoftJson or others famous nuget packages. Right click on the template solution, go to properties and check "Generate nuget Package on build" on the Package tab.

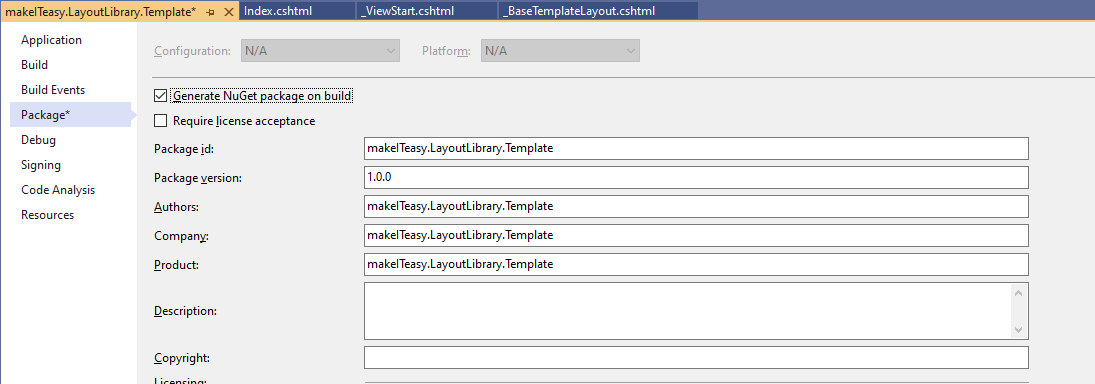
After the next build, in the bin folder of our template project, we will have a nuget package that we might upload to our favorite nuget repository during our CI/CD process. That is awesome !
2. Front end tooling
I'm a great fan of library manager for its simplicity and its smart integration into a VS solution. Unfortunately, RCL projects are not supported. As a workaround, on our webApp project, simply add a front package (right click on webApp project, Add, Client-Side library and choose jquery for example). Copy paste the file libman.json from webApp project into our template project and tadam , we get libman enabled in our template project. By default, libman will download front librairies in folder wwwroot/dist


As well, if you have Bundle & Minifier extension, you can enable bundle and minifcation in our template project.
Bundle and libman can be processed on build, no need to embed external front libraries in our source control. To enable bundle & libman on build, right click on respective config files and enable them for build.
Now, we have some cool front libraries in our template project, we can use them in our base layout view. In order to reference an asset, we must prefix it by /_content/[AssemblyName]/pathToAsset
wwwroot folder is not part of asset path. So if I have a logo.png on my wwwroot/images folder, my path will be : /_content/makeITeasy.LayoutLibrary.Template/images/logo.png
3. Partials & Razor development
Partial views are supported. This helps to get a better organisation in our template files. We might have a layout file for header, footer, menu navigation …
Just create a partial view and reference it with :
@addTagHelper *, Microsoft.AspNetCore.Mvc.TagHelpers
<partial name="_BaseTemplateFooter.cshtml"></partial>
or
@await Html.PartialAsync("_BaseTemplateFooter")
The template project supports all razor features so imagination is just your limit :)
4. Sections
To improve file organisation and keep a clear separation of assets between template and implementations, we may use Sections. By doing this, our webApp can integrate part of its logic into the template without changing the integrity of the template.
Usually, template project contains only scripts that are related to the template (captain obvious). Our webApp will also have assets related to its scope and we need to inject them on the base template. We will proceed by using sections giving some free rein to the webApp on a limited placeholder.
Add the RenderSection directive in the base layout template
@RenderSection("Scripts", required: false)Fill the Section in our view (or layout)
@section Scripts{
  <script>
  console.log("hello from the view");
  </script>
}
5. Passing content from View to Layout
Let's see now how we can pass content from our view to our template layout. It can be done with ViewBag, ViewData but I prefer to use dependency injection.
Imagine that our controller/view need to pass the title of the page to the template layout. In our template project, let's create a basic class PageDefinition that will contain a property Title.
public class PageDefinition
{
  public string Title { get; set; }
}
Register this class in our webApp startup, services configuration
services.AddScoped<PageDefinition>();In our controller, let's set the title of the page :
Final step is to use the value injected by DI in our template layout.
Conclusion
As you can see, packaging a website UI is as simple as developing a dotnet library. This process will ensure a high consistency between all your web projects and will help you to better organize/track your UI update. Razor Class Library rely on aspnet core development foundations so quite easy to onboard.
If things are not clear enough, you'd better check the project or code :p
Hope you like this article, don't hesitate to drop me a message for any concerns :p